How to Create a Video Intro or Video Bumper for Your Videos
Disclosure: There are some affiliate links below, but these are all products that I highly recommend. I promise that I won't put anything in this post that I haven't verified and/or personally used. Thank you so much for your support!
When I first started doing videos, I learned all kinds of new terms like lower third, bokeh and video bumper.
The bumper was the first one that I tackled and I’m thankful that I did. Think of a video bumper as being similar to a bumper on your car, it protects your car on both the front and the back. A video bumper does the same thing, it frames your video.
Does that make sense?
It’s also known as an intro! Of course, you don’t have to have an intro/video bumper but it does help you and your videos look a little bit more put together!
If you want to go ahead and watch the video training you can do so below, if you'd like the step by step walkthrough continuing reading below the video.
Here's what a few people are saying about this video training:
"This is amazing. Who knew the intro is also called a bumper, so many more search results than youtube intro. Thank you."
"Nice walkthrough! Thanks for sharing!"
"FINALLY- I'm going to create one this weekend! THANK YOU!"
"I love this video, Lindsey! You explain everything well, the editing is awesome, and I love how I can get a feel for your personality through your laughter and enjoyment for the process."
"I was looking for this last week, and I had no clue what to call it, as I wanted to look into creating one. Well, I gave up frustrated. Now I have the solution "
Here are the steps that I took to create my video intro/bumper (and how you can too!):
Step 1: Research
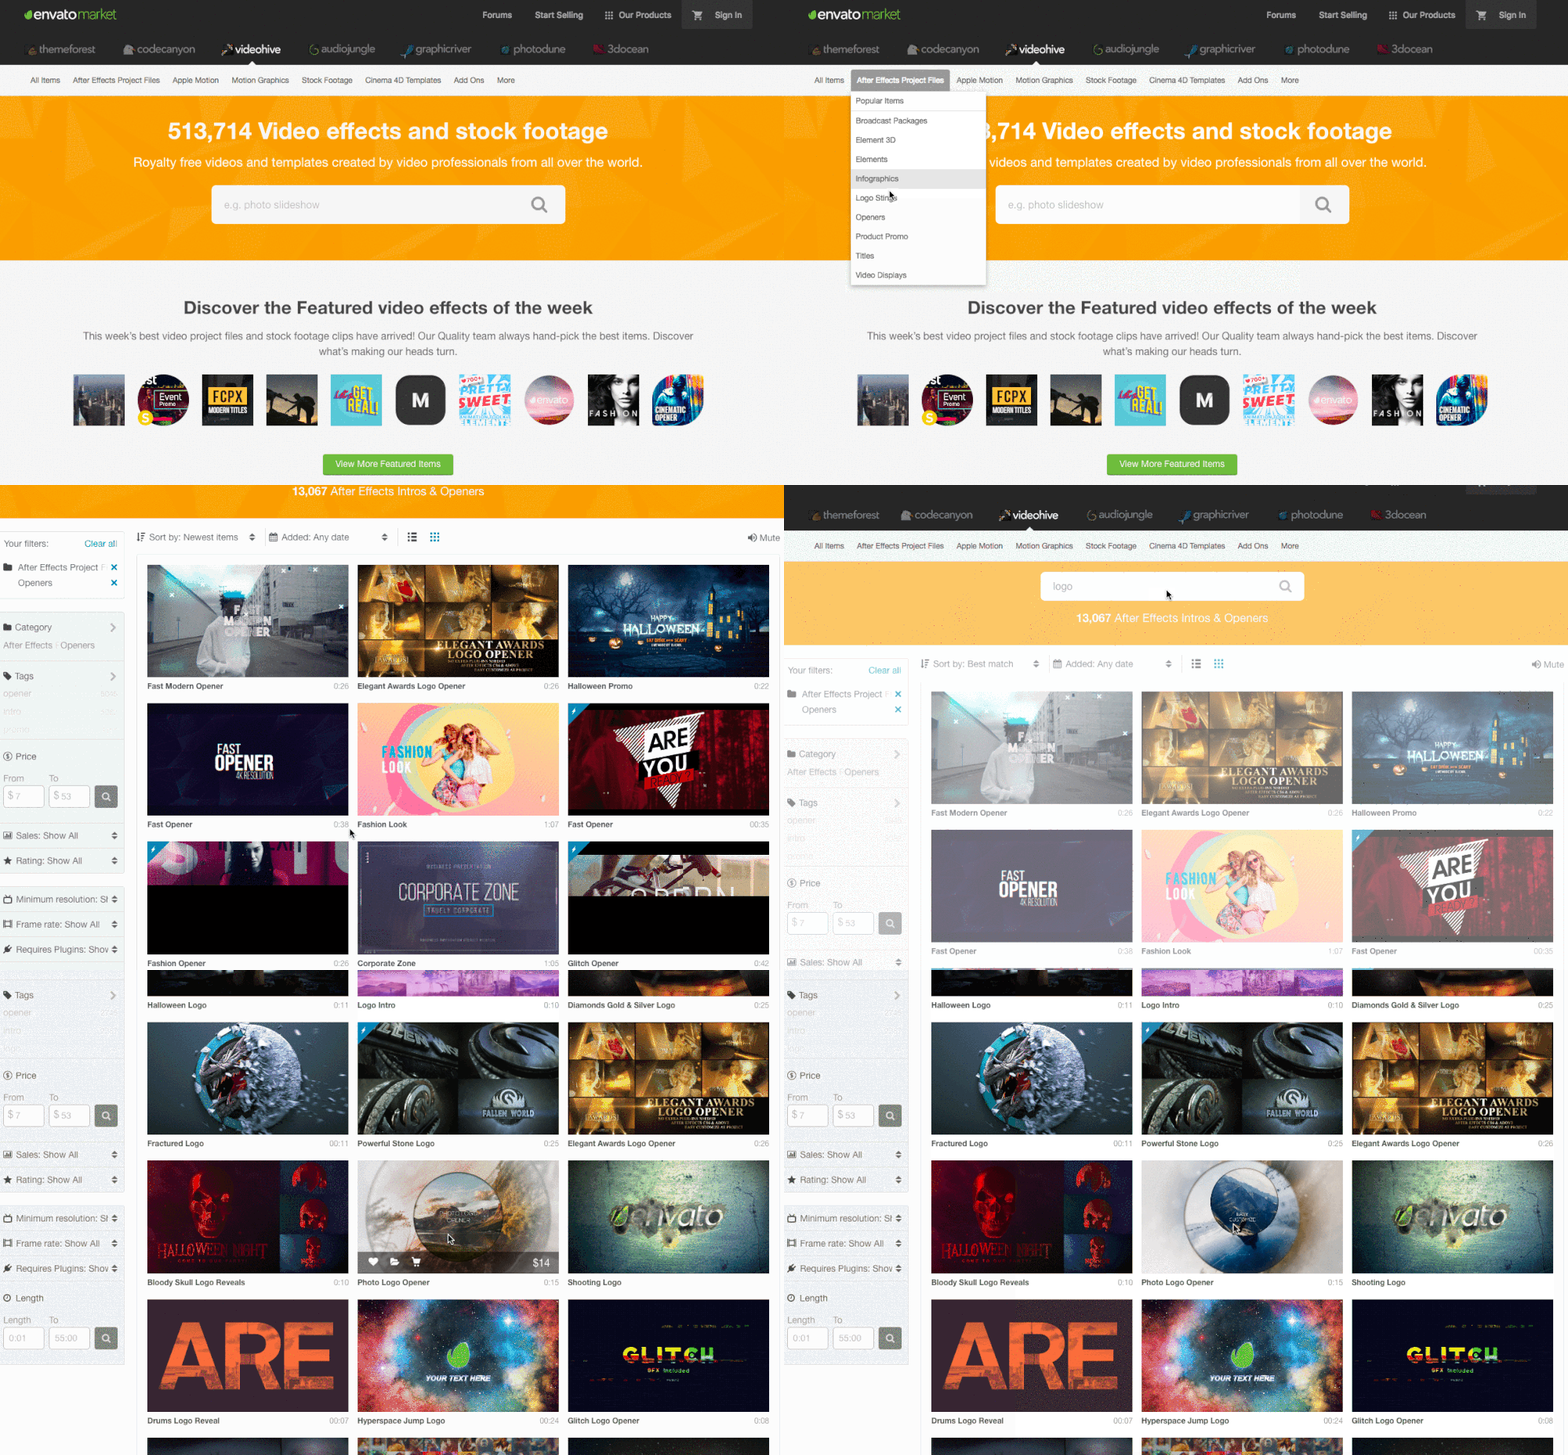
You want to go to video hive which is through envato market. Then you want to look for logo stings or intros. I went with after-effects and then I just picked a few different things that I wanted.
DISCLAIMER: You can easily spend a lot of time going through all of these but and just try to think of something that is on brand and with what you have going on with your videos.
Then start playing through them and just finding ones that you might be interested in.
So this is the one that I ended up choosing and it came with about twelve different versions which was really helpful incase I want to use them in the future.
Step 2. Sync up with sound.
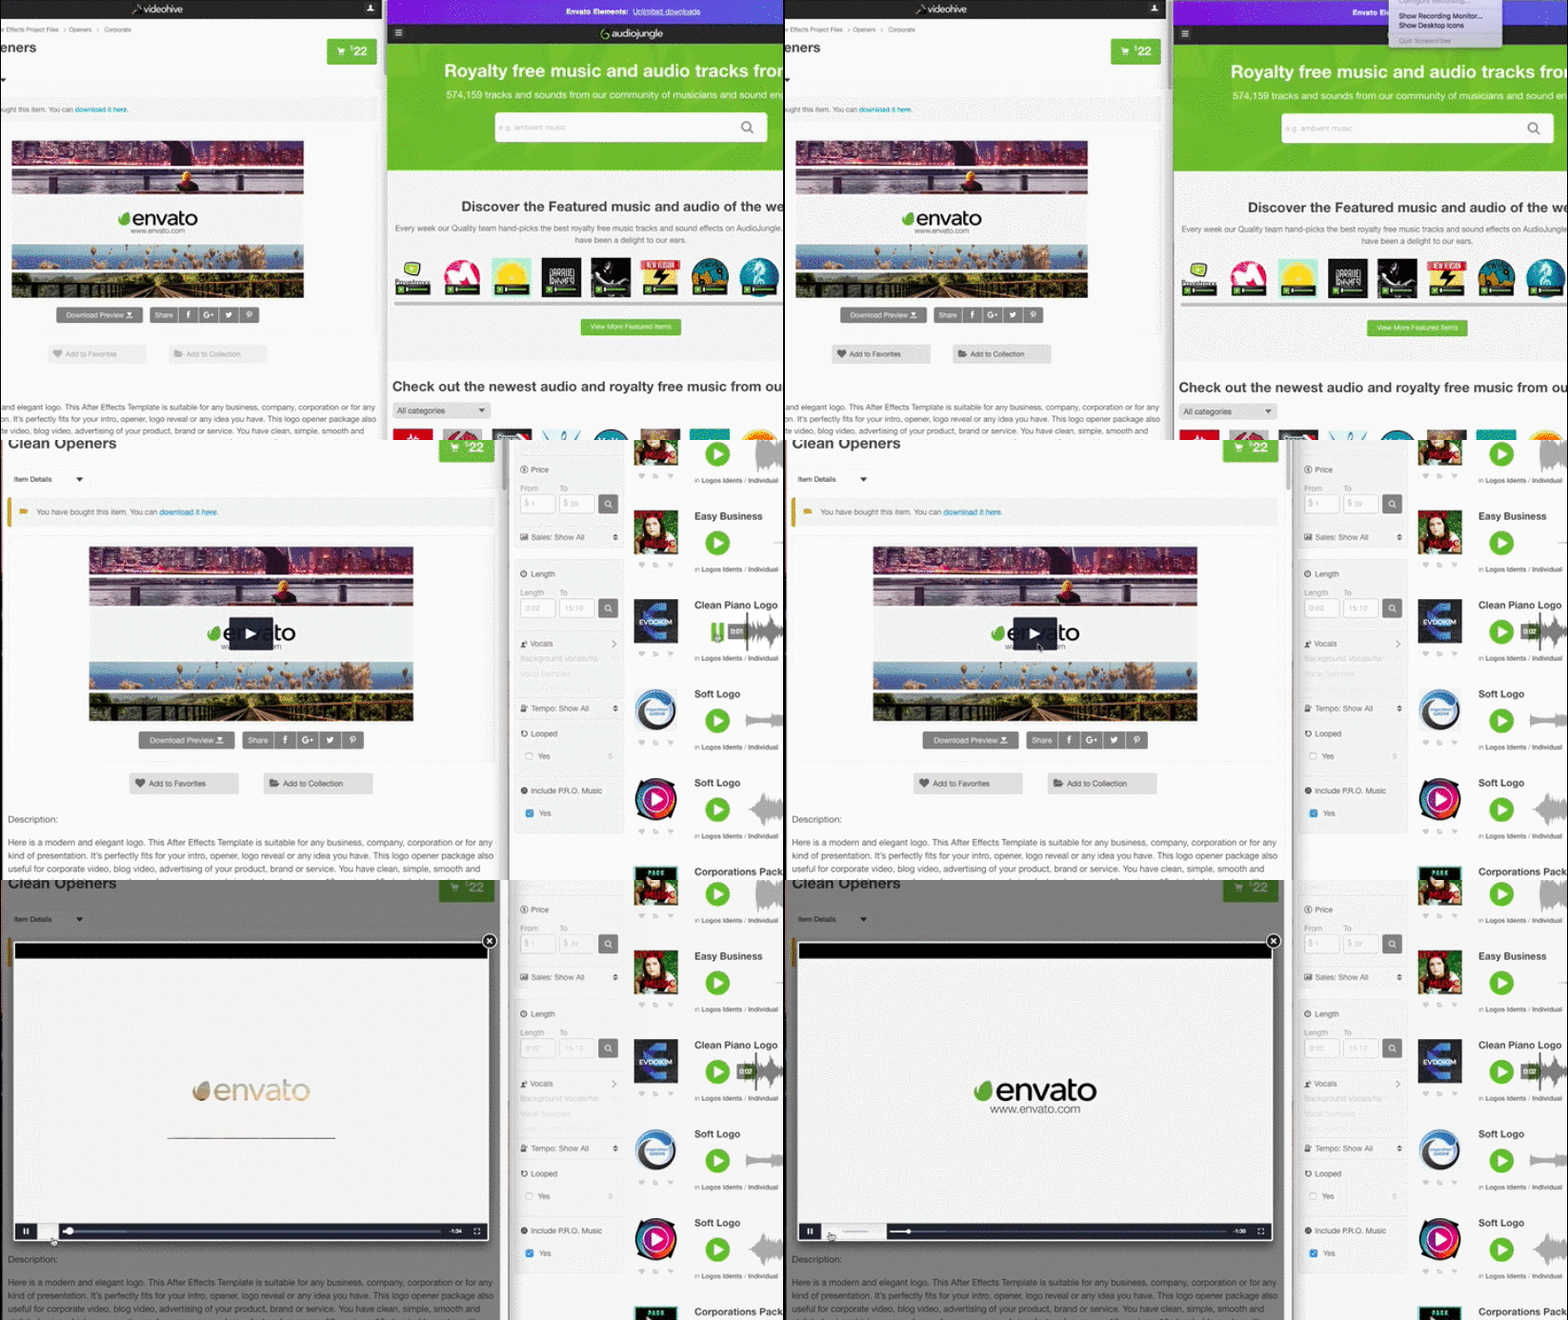
The best way to do this is by getting two browser windows next to each other.
In one window use your videohive with the opener that you want to use and then in the other window go to audiojungle.
I tried to find ones that were similar to the same time as my opener.
When you're searching for audio for your opener, sometimes it will even have opener in the file name, so for instance if you chose a logo sting for your video you could look for an audio file that has logo sting as well. This helps when you're trying to go through all the different audios.
I tried to get my video to play at the same time that my audio would play at so I could try and line them up and see which ones fit best.
Note: Anytime you hear ‘audio jungle’ said with a female’s voice on somebody's video you know that they just downloaded the free version.
You can play through different ones to see what is out there to choose from. Some of them are really not what you want and that's okay but at least you know that you can go through them and find ones that you need.
Once you find on that pairs up pretty well you want to click on the title to get the info on the audio file. Then you want to make sure that it doesn't have any licenses or if it does have a license you can abide by it.
For most of these you can go ahead and download the templates and then you can put it in something like iMovie or ScreenFlow or whatever video editing software you're using to see how well they line up as well.
This is the audio file that I chose for mine.
Step 3. Make your purchase.
Once you have decided on your video intro as well as your music go ahead and buy the ones that you want so you can continue to the next step.
Step 4. Find someone to hire.
I used somebody on Fiverr just because it was a lot easier than trying to do a lot of research and I had a friend who had used this one guy.
I searched for after effect logo opener or search for whatever files that you bought.
Look for somebody that will use those same files and as you can see there's tons of people that are like ‘hey I'll do this for you and here's how much I charge’ or you know it starts at this price point etc.
I hired Frank D and he is in Greece. Oh my gosh it was awesome, I sent him my files and I said hey this is what I want. He responded within a very short amount of time and next thing I know I have my completely formatted bumper or video intro.
It saved me so much time and money. I think I only spent about $30 total video/audio files included.
I highly recommend Frank just because he was really great to work with.
This is the one that I chose, “I will edit any After Effects template from videohive” and he lists all the different things you have to do so that was super helpful while I was putting these things together.
Step 5. Organize your files to deliver.
Once you have decided that you are going to hire someone it will be a whole lot easier on yourself and them if you just go ahead and organize all your files into one folder.
I took everything that I had for my bumper and put it in a folder on my Mac.
In the folder, I included:
the download for my video intro file ( which is the after effects file)
the audio jungle file
I chose some stock images and put my brand color overlay on them in Canva.
my logo
my website
And a note explaining everything.
I packaged everything up nicely so that when it was passed over to Frank he would able to say okay here's everything I need and then if he had any questions all he had to do was email me. Easy peasy.
Step 6. Wait patiently.
After you have passed everything over it's really easy to think “Ahhhh where is it!?!?!” but just wait patiently and know that your project is in good hands. Most likely whoever you decided to go with will also have a revision of some type, so if you don't like what they send back to you, you can send it back and they'll shoot you one that works.
and finally….
Step 7. Import your file at the beginning of your video.
Once you have your complete bumper and it's good to go you will be able to add it to your videos.
When you go edit your next video, you will upload it into your video software and add it to the beginning of your video.
If you’re using ScreenFlow:
Click on ‘add the media’.
Choose your bumper.
Click and drag it to the front of your video file.
Play through it so that it works.
Resize it if need be
and that's it!
Do you have to have a video intro? No.
Does it help your videos look a little bit more professional? Yes.
I could have definitely figured out how to create a video bumper or video intro on my own by downloading After Effects or Keynote like Conrad Know How showed but why waste all of that time when you can hire someone to do it for you?!?
If you do want to hire someone to create your video intro or do video animations for you here are a few people that I recommend:
Now you know how you can create your own video bumper or video intro.
Be sure to enroll in my Free Course so that you can learn all about my favorite tools and resources that I love and use for my business.

Hey there, I'm Lindsey the online educator behind hazelhaven.com. I help creative business owners learn how to use the tools to grow their online oresence. I'm an introverted extrovert who loves tech systems, dark chocolate and a strong cup of coffee. Be sure to join my free community by clicking here Creative Biz Haven.
Have you created a video intro yet? Do you think that you will now that you know which steps to take? Let me know in the comments below!


Leave a comment